Friday, November 30, 2012

D-2 to Ethan's Birthday

OH MY LEGS!!! My aching legs......after this party...i'm gonna just sit around and not do anything for awhile.....

so my friend was saying how she's interested in making cake pops and bought a cake pop machine......and i tot...wat a brilliant idea for a little "door gift" for the party....so i started researching on bakeralla(goddess of cake pop) as well as other websites and bugging friends, who have actually manage to do it successfully.

researching on the internet doesn't really give u much confidence...it's full of people crying...swearing and cursing at cake pops.....so i started to worry....i really hate to do something and have to give it up halfway because i can't do it...it'll just annoy the heck out of me.....so here goes...

Had two packets of Ghirardelli Brownie Premix left..so that's what i used....once they were done...i basically let it cool just a little....cut off the four crusty sides and mashed the brownie together....then i rolled them into balls and sort of press them to flatten them a little....using brownie as pop, u really don't need added frosting..the trick here is to roll while they're still warm.....

I know...at this point..they really look like droppings


Once they have been rolled,  leave them to cool. instead of using candy melts, i use cadbury chocolate melts....i think they're great to work with. i followed their microwave instructions...no problems at all......dip the lollipop sticks in the melted choc and stick them into the balls...not too far up...the balls will break....for the ears...oh...did i mention tat they're Hello Kitty brownie pops....i used mini choc chips...just use a little melted chocolate to stick them to the balls.

yes..they looked kind of devilish...


Into the fridge they go....10 mins...just for the choc to set....take them out and now dip them into the melted choc....give them a little tap to remove excess choc and stand them to set...

TA-DA....the worst is sort of over....


Now that the pops are sort of done.....i have to get my cake boards ready....fondant covered cakeboards looks soooo pretty....i reckon.... roll the fondant out on icing/cornflour dusted work are...to transfer the rolled fondant onto the cake board....just life them onto the rolling pin and onto the cake board....trim the sides with a butter knife....i use edible glue to sort of hold them in place.....see that little indentation on the pink board...i wonder if it's because of the glue...hmmmm...cake boards should be covered at least a day ahead...to sort of let it harden before u put the cake on it.....it will decrease the chances of damaging the fondant on the board....

Pops and cake boards....


Tips from the Internet:
  • If pops are too cold while dipping in choc, the choc will crack when it sets
  • Do not overheat melts
  • If using frosting in pops, add a little at a time....too much frosting and the pops will slide off the sticks
  • If pops have bubbles (mine does...sigh)....oil might leak as a "weak" spot is created

Tuesday, November 27, 2012

D-5 to Ethan's Birthday

Finally got my marshmallow fondant and my Dear Daniel caps done...i know...the caps don't really look like caps...boo hoo...am hoping that with an addition of a letter on it, it can be salvaged....

so why marshmallow fondant? firstly, i had a few packets of marshmallow sitting around and secondly, i heard that they are yummier than fondant fondant....so here's the recipe. oh...and fondant is always easier to handle a day after....so prepare ahead!!

My supposedly Dear Daniel caps....

Marshmallow fondant...can't wait for the taste test on DD


Useful Tips from the Internet:
  • Never keep marshmallow fondant in the fridge
  • Shortening helps prevent fondant from sticking to hands and work surface
  • Always prepare more. It's hard to get the same colour if you need more
  • Wrap in cling wrap and store in air-tight container or bag in a cool dry place
  • If it hardens too much, zap in microwave for 5 secs

Ethan and Tissue

Same gene pool...same thought process??

Jayden and tissue


Saturday, November 24, 2012

D-8 to Ethan's Birthday

Was suppose to make the marshmellow fondant today but it was sooooo hot...there was no way I was going to knead and roll something that might just dissolve in this sweltering heat....argh...decided to do the easy stuff...heee...hello kitty bow and the letters...

The plastic cutters were a little hard to work with but i'm riding on confidence remember...heee...rolling out the white gum paste was easy enough...cutting them using the cutters wasn't....the letters were a little too fiddly and the gum paste was a little too soft....so rather than using the cutters to cut the letters...i sort of did a deeeeeeeeeep emboss on the gum paste, then let the gum paste harden just a teeny bit...not too much...else the letters will crack....then using a modelling tool...peel and cut the unwanted parts away...TADA....perfect...

I was so happy with myself that i forgot to make extra...sigh.....it would serve me right if they decided to break into pieces at the very last minute....

Happy to say..the bow was much easier.....roll the red gum paste into a long tube...use a rolling pin to flatten to the desired width....trim the edges to make it even...emboss the edging with modelling tool. Of course doing all tat will still be a long flat piece and no ribbon...heee...so wat do u do? Making sure that the "inside" is facing up, gather both ends to meet in the middle and overlap one end slightly onto the other end....use a little water as "glue"....crunch the middle slightly and flip the ribbon over(pretty side is facing up now).......make a round gum paste piece and attach it to the crunched middle part of the ribbon....

Wanted to make the ribbon a little prettier...so I stuffed kitchen towel while making the ends meet so tat the sides are a bit puffed up....leave it to dry with the kitchen towel inside.....DONE!


Ethan wants Mummy

his "i-want-mummy" face..heee


Friday, November 23, 2012

D-9 to Ethan's Birthday

I've started on the second cake. It's made using Ghirardelli Brownie Premix bought from Costco. I've used 2 packets and baked it into a slightly bigger than A4 size tray. I found the picture, which I wanted, printed it to A4 size and cut it out to use as a stencil.

I placed the "stencil" onto the brownie and using a serrated knife, shaped the brownie.

Brownie is now sitting in the freezer wrapped in both cling wrap and aluminium foil.

YEAH! One cake done and since brownie freezes really well, I thought this will be great to cut down on some last minute rushing.

Shaped brownie using stencil


Useful Tips from the Internet:
  • Make sure cake is cool before cutting, it's much easier
  • Cake must be completely cooled before wrapping tightly and putting in the freezer to prevent it from sweating when defrosting. 

D-17 to Ethan's Birthday

So this year I've decided to embark on a massive mission. Riding on my new found confidence (or over-confidence..depending on the success of the party) of having done one collaborative project - Banana in Pjs cake, I'll be making 2...yes...not one but TWO cakes. One for Ethan and another for a friend's daughter, Jaelyn, whose birthday we'll be celebrating together.

I get sweaty palms just thinking about it.....firstly, I'm not a baker. Not even pre-mix cakes can save me. They always turn out too dry, overcooked or just bad. SO WHAT WAS I THINKING ABOUT....I figured if I started early enough and failed, there's always time to rush out to get a store bought one and there really isn't anything that can compare to that sense of achievement if it works according to plan.

Between looking after 2 kids, surfing the net and the occasional housework, there really isn't much time for fondant rolling, cake baking etc..so I've decided to start this project wayyyy before the D-date.

This was what I made for the past week since you really need to let the figurines dry for a couple of days. Figurines are made of Satin Ice gum paste.


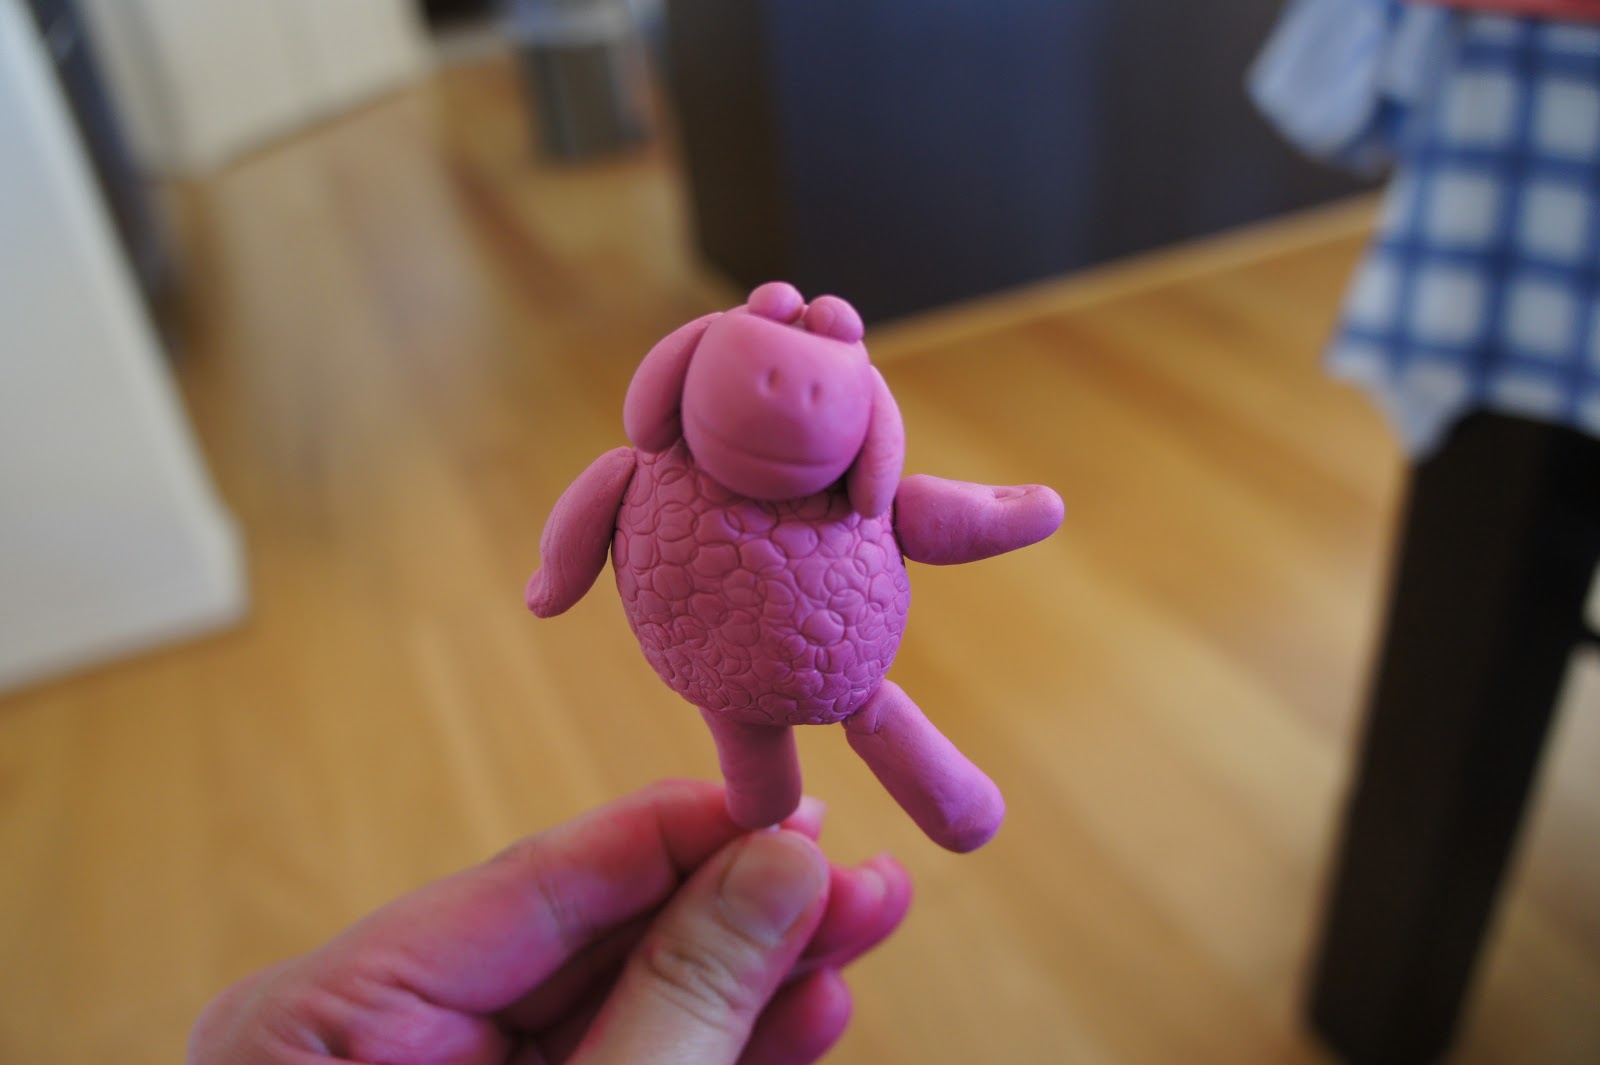
Prototype made with Playdoh

Purple Sheep

Purple, Yellow, Orange, Green Sheep and a Bush

I used a straw to "emboss" the sheep's body for a fleece-like look.
To attach heads, arms and legs to the body, I've stuck a piece of spaghetti in them and added a bit of edible glue.
To attach eyes, I've just brushed a bit of water.
As I want the figurines to be upright on the cake, I have inserted a lollipop stick through one of the legs, hoping that it will be sufficient for the figurine to stay upright on the cake.

Useful Tips from the Internet:
  • Always keep gum paste wrapped. They dry out really quickly
  • Keep leftover gum paste tightly wrapped and place in air-tight container in a cool dark place
  • Never put gum paste in the fridge
  • Gel paste is really the best to use for colouring gum paste
  • If it gets too sticky while kneading gum paste, coat hands with melted shortening
  • Too much sun will change the colour of the coloured gum paste

Ethan and Ball

heee...Ethan can now say neh neh (milk), ma ma (mother) and ball (self-explanatory)....


Friday, November 16, 2012

Ethan and Walker

Who says he doesn't have a walker.....

Ethan and Belly Button

hee hee...see his tummy...for someone who doesn't eat...it's one huge tummy....heee...and yes...his hair...i did it...sigh...i should retire as his hairdresser

Tuesday, October 16, 2012

Bananas in Pajamas Cake

so a few of us gals got together to embark on this delightful mission....bananas in pajamas cake...first attempt for all of us...i've got to say...i'm quite happy with the results...figurines made with gum paste and the cake is covered with fondant....if u take a closer look, it's abit cracked...i mite attempt to use 50/50 (WOW...baker talk for half gum paste...half fondant - i think) for the figurines....TADA...cute ma??


Wednesday, September 26, 2012

Chocolate Chip Pikelets

Craving for something with choc but didn't want to bake anything...u know..something like really quick...so decided to make choc chip pikelets..hee..YUM YUM

Ingredients:
1 cup self-raising flour
1 tbsp sugar
pinch of salt
3/4 cup  milk
1 egg
1/2 tsp vanilla extract
chocolate chips

Method:
1. Mix all wet ingredients together well.
2. Stir in the dry ingredients. Leave the batter to stand for 10 mins.
3. Cook as you would a pancake on a pan over the stove.

Monday, September 24, 2012

Jayden and Snow

Slacking for the past 3 months....so here's some new pics to get me started again...heee...Thomas and Jayden's day out at Lake Mountain...aren't the colours just gorgeous...

Getting ready to throw snowball

So ski catalog

Making snowball

Thomas chillin'

Watch out!!

Thursday, June 14, 2012

Rainbow Muffins

so...there's this 'rainbow' craze going on now apparently...rainbow cakes...rainbow biscuits...rainbow muffins etc....i never thought that i would jump on the bandwagon since 1. i dunt like to use food colouring 2. i never tot they were pretty....*dont shoot me*..but u know..since it's like a craze...i wanted to be able to tick the box and move on....i succumbed to it ...except mine came out to be more of a 'multi colour' muffin since the layers werent perfect

the thing about making the muffins or cupcakes (watever)....you have to make sure that the colours are really shockingly vibrant.....the brighter and bolder the colour of the batter is before baking, the better....as you can see in my pics.... the colours that are not as vibrant came out abit dull....

i used my chocolate and green tea muffins recipe (without the matcha and cocoa powder of course) but there are lots of other recipes out there using alot less ingredients....once u got the batter ready, just divide the batter up, add colouring and then layer the batter one colour at a time in muffin cups the bake it....i started off using muffin cups..then got lazy and just did it in the muffin maker directly...they came out pretty as well...as you can see in the pic....

this is the natural food colouring i used


Batter before baking

Muti-coloured muffins!!


so...did J and T liked them? unfortunately not....the muffins werent the problem..the problem was the colours....it actually grossed them out....hahhahaaaaa....but it's a good thing isnt it?? means i dunt ever have to make them again....although....with some fresh whipped cream or icing on top..they mite look pretty good for a party......

Tuesday, June 12, 2012

Jayden and Ethan - 2

1. Jayden loves anything with wheels...keeps him happy
2. Ethan loves being moved around...keeps him happy

Most importantly...

3. Keeps me happy since there's peace...hee heee

Jayden and Costume

Kids by Day...Superheros by Night...or so they wish...sorrie uncle kit...u had to be in the post...tat was the best pic of the kids...

B1 and B2 have graduated from Banana Parties to Spiderboys

Transformation taking place

Need to hit the gym..those muscles dont come easy

Wednesday, June 6, 2012

Sweet Potato Balls with Azuki Bean Paste

had some azuki bean paste leftover from my dorayaki adventure....so decided to put them in the sweet potato balls....wow...seriously...will only make the balls this way next time...the azuki bean paste brought the little golden nuggets to a whole different level...wow...

you can make ur own azuki bean paste(too troublesome) or just buy the canned ones from asian grocery....

Link to the original recipe:
http://rasamalaysia.com/malaysian-recipe-sweet-potato-balls/2/


Ingredients (my version):
450g of sweet potato
12 tablespoons of all-purpose flour
3 tablespoons of sugar
4 tablespoons of azuki bean paste
Water
Oil for frying

Method:
  1. Steam the sweet potato with the sugar until soft. Mash
  2. Add the flour and mix well. At this stage, the dough should be sticky. DO NOT ADD MORE FLOUR
  3. Add just enough water to form a dough that is soft but not sticky
  4. Flatten a pieces of dough and add azuki bean paste in the middle. Roll the dough to form a ball. Wetting hands with water makes the dough easier to handle
  5. Shallow/Deep-fry the sweet potato balls over medium low heat until they turn golden brown. Dish and drain well. Serve warm
So so good with the filling...bursts in mouth

Tuesday, June 5, 2012

Dorayaki

I found this at the local asian grocery. Love "kits" that includes(almost) everything. All I have to do is add 1 egg and 70ml of water. It even comes with azuki bean paste...heee..made some with the paste and for J..nutella of course....makes around 4-5 daddy-size dorayaki...


Method:
  1. Add 1 egg and 70ml of water to the powder mix
  2. Stir to form a smooth batter
  3. Heat pan
  4. Add a little oil/butter to the pan
  5. Pour in batter like you would a pancake and cook over medium low heat
  6. When it starts to bubble, flip it over
  7. Remove and spread with bean paste(or watever)
  8. Cover it with another "pancake". Press the edges to seal the sides
Dad size, Mum size and Jaydee size
Could have added more filling since I had almost half a pack left


Monday, June 4, 2012

Ethan and Spotted Nose

okay...so it was only 1 spot..but it's looks HUGE on his nose...(click on pic for a larger view of the spot)


Croissant Breakfast Casserole

This recipe is amazing and so so so yum...you can basically add anything you like and as much or as little as you like..just make sure that stuff like bacon is precooked...mushrooms as well..since they "produce" loads of liquid...

Points to note:
1. This recipe is better left overnight in the fridge for the flavors to come together nicely before baking
2. Do cover the ramekin with foil else croissant will brown too much
3. I did not grease my ramekin and a little got stuck. I would recommend greasing it LIGHTLY


Link to original recipe:
http://www.food.com/recipe/croissant-breakfast-casserole-71017


Ingredients(my style):
1 plain croissant
1 egg
1/4 cup milk
mushroom(precook so there's not too much liquid)
diced ham
cheese (i used mozzarella and parmesan)
pepper to taste

Method:
  1. Split croissant in half and place bottom cut side up in one layer in a ramekin
  2. Beat together egg and milk
  3. Pour half over croissant, layer mushroom, ham and cheeses on top, then pour over remaining liquid
  4. Position croissant tops over the bottoms, cut side down
  5. Let stand over night in the refrigerator
  6. Bake at 175 degree Celsius for 25 to 30 minutes or until set